How to upcycle your Vintage writing table? Well, with some tools and lots of imagination!
When I sold my writing table after graduating in Art History and finding a full time, office based job, I already had a clue, that this wasn’t going to last forever. Living without a proper writing table at home felt RIGHT BUT WEIRD at the same time. After five years now writing on the couch and the dining table, it’s been time to look for a proper SECRETARY – even more so with the birth of my blog baby last April. What a wonderful occasion to visit Vienna’s antique stores! At the Glasfabrik it was easy to delve into VINTAGE DREAMS. And – as I have often experienced it – I was ready to pay good money for a beautiful vintage table, but didn’t find any, that met all of my CRITERIA. My writing table was supposed to be big, black or dark brown and have loads of storage space. All the wooden princesses there were magnificent but were not really meeting my needs.
Make COCO proud – at MODEST costs
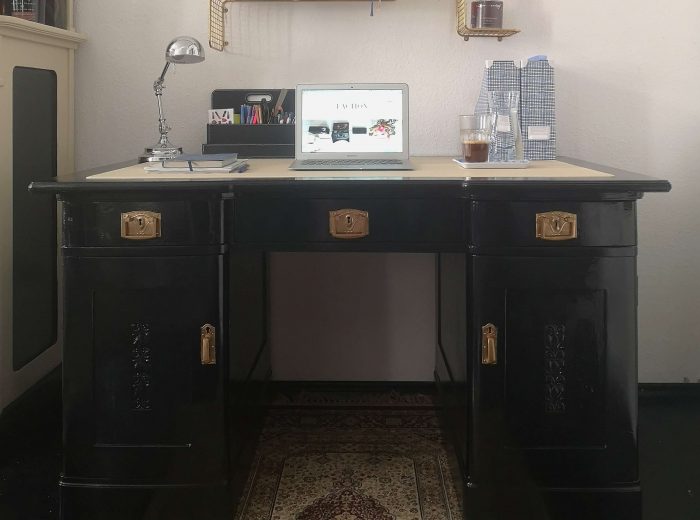
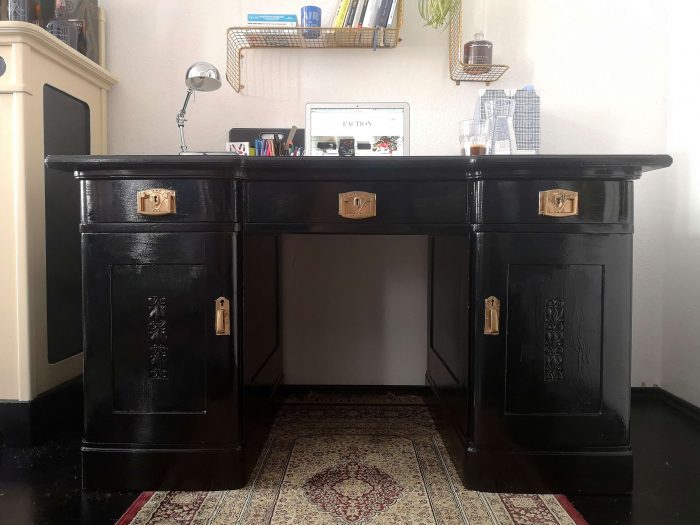
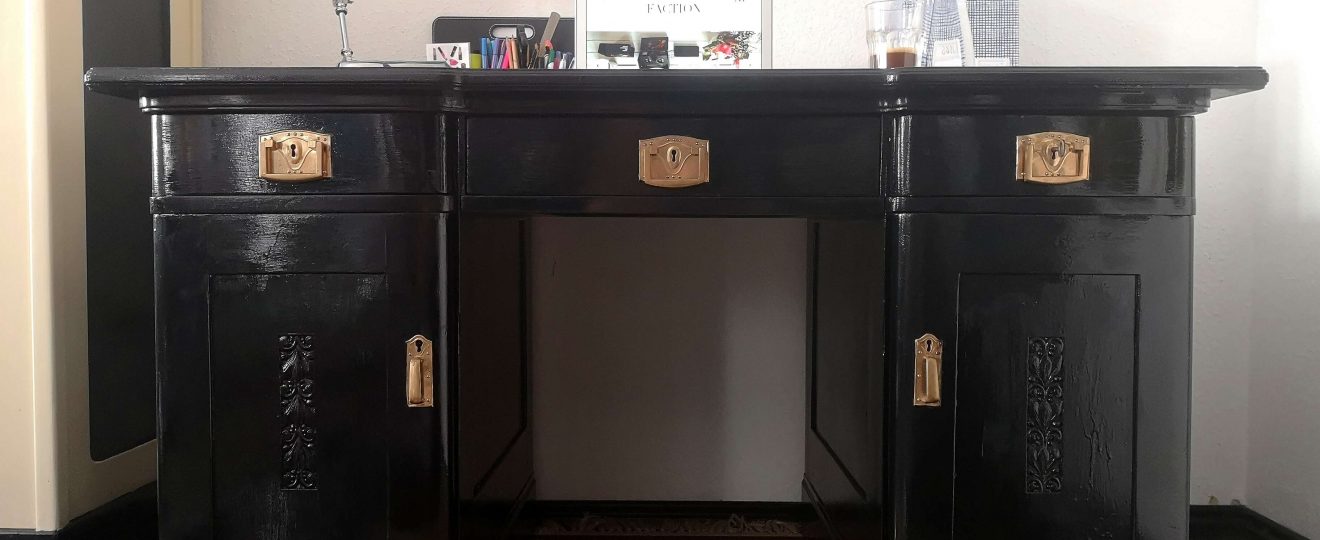
Instead I found a really cheap sleeping beauty at the Sale section: A beautiful, probably 40s or 50s desk with many drawers and some beautiful carvings for modest 150€. Its condition was not really glamorous, but rather ready for a GLAM MAKEOVER. I decided to stick to a Chanel style, color and design: Loads of black, a beige table cover plus golden details would make Coco proud!
What I NEEDED
Abrasive paper
Gold & black spray paint
Prime color for wood
Wood paint
Paintbrushes
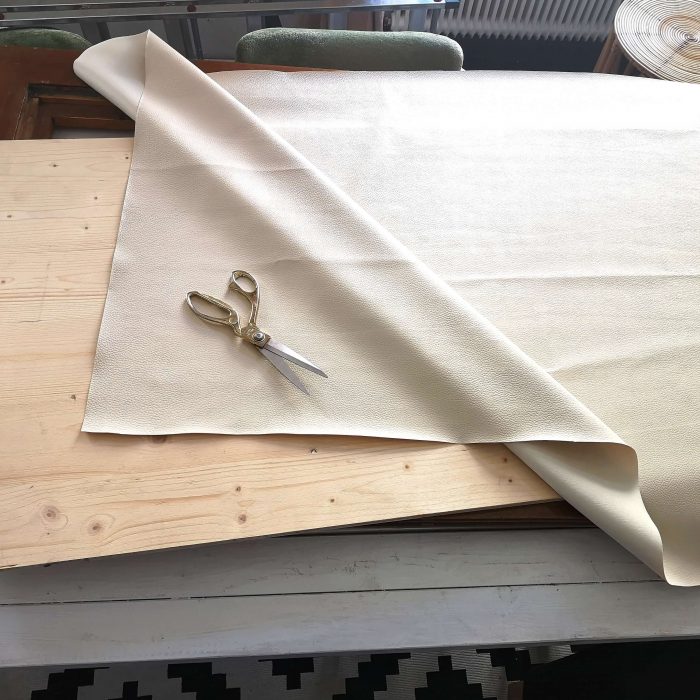
1 m of solid fabric for the desk’s cover (mine was fake leather)
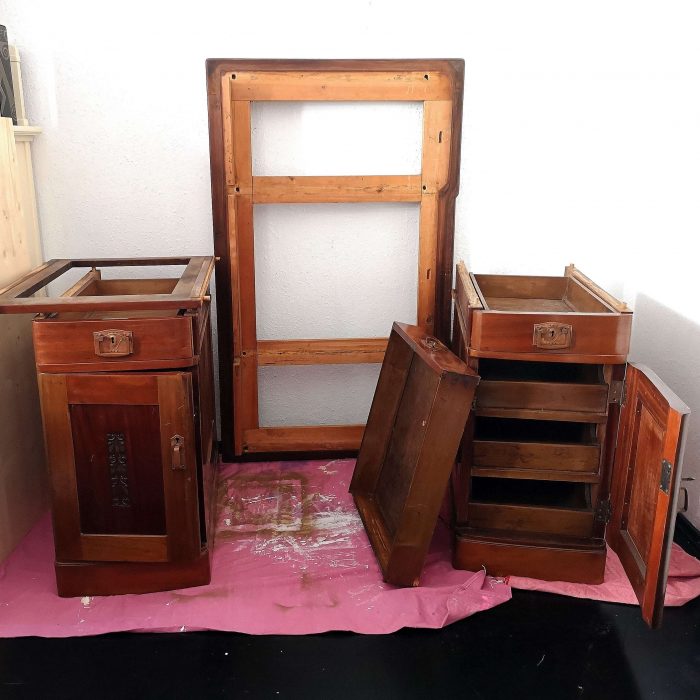
Where I STARTED
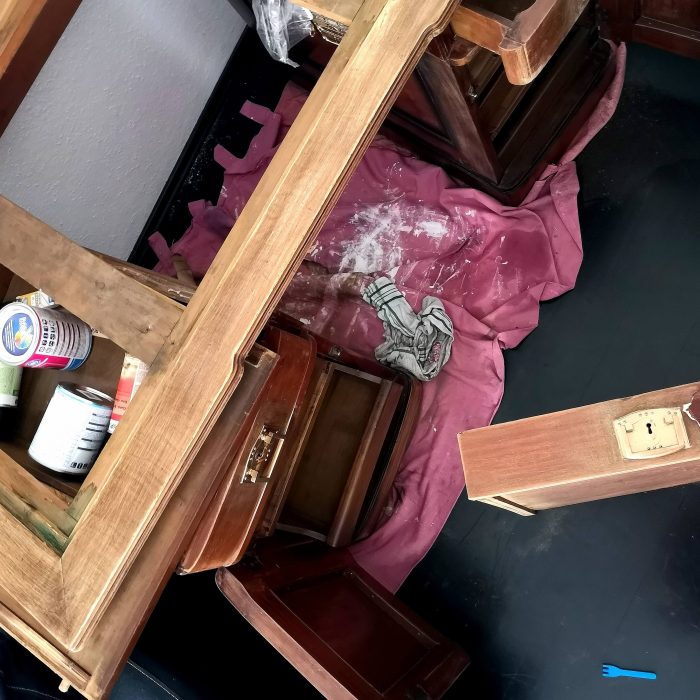
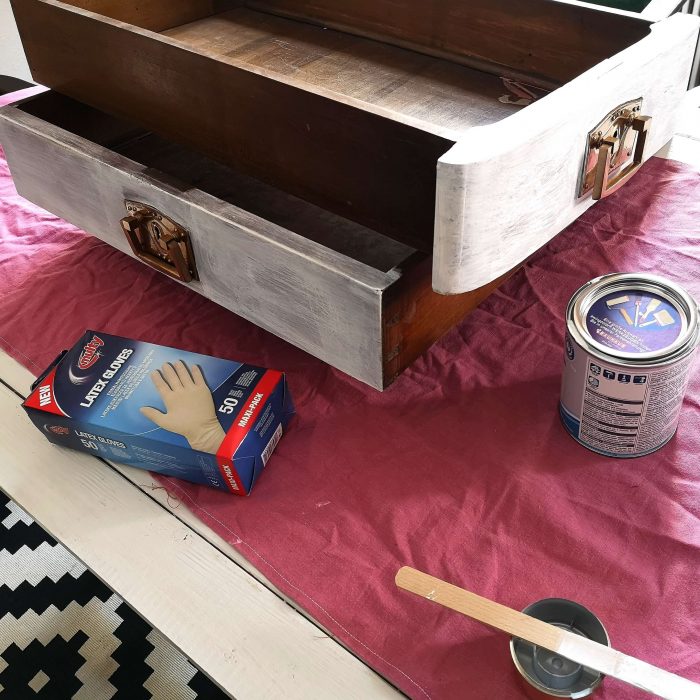
Well, the not so glamorous part was the starting point: I needed to PREPARE the wood for the paint by sanding it with a lot of abrasive paper. That took quite some time, because there’s a lot of surfaces when it comes to vintage furniture.
The next (frustrating) STEP
The next step was another rather frustrating one: Before I could apply the final color, I had to cover the whole thing with the prime color for wood. In my case it was particularly annoying, since the prime color was white, whereas my final color was black. Anyhow it was worth the TIME AND PATIENCE, because the final piece looks much better and the paint is much more durable.
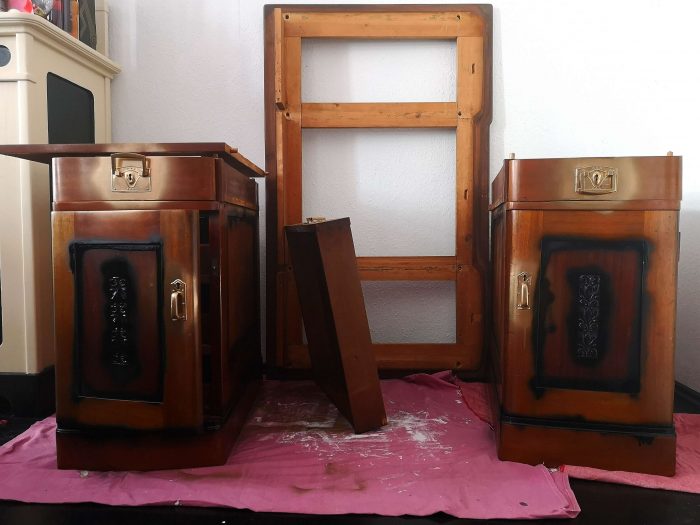
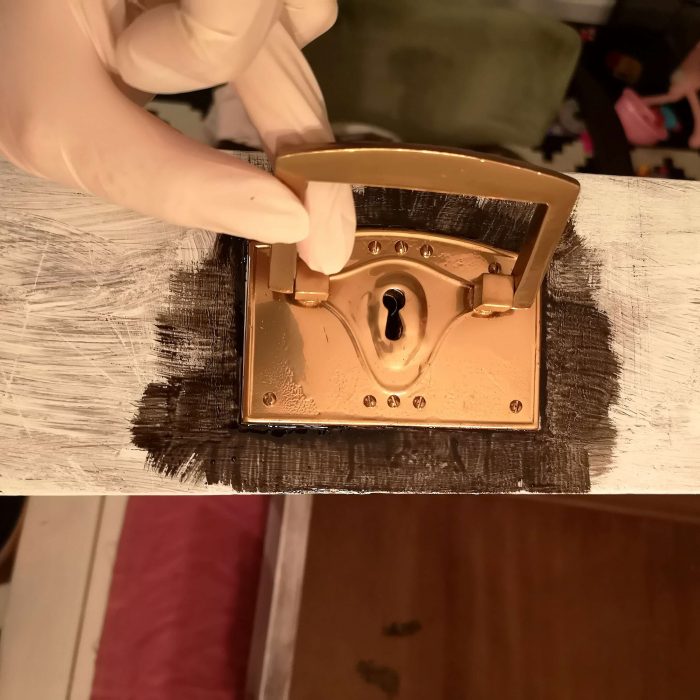
Anyhow, I didn’t cover all parts: I spray painted the carved parts directly with the final color, since too many layers would have filled the fine lines of the carving’s motive.
Applying that final LAYER
Now I finally began with the beautiful part: With the GOLDEN color I spray painted the metalwork, which was super easy!
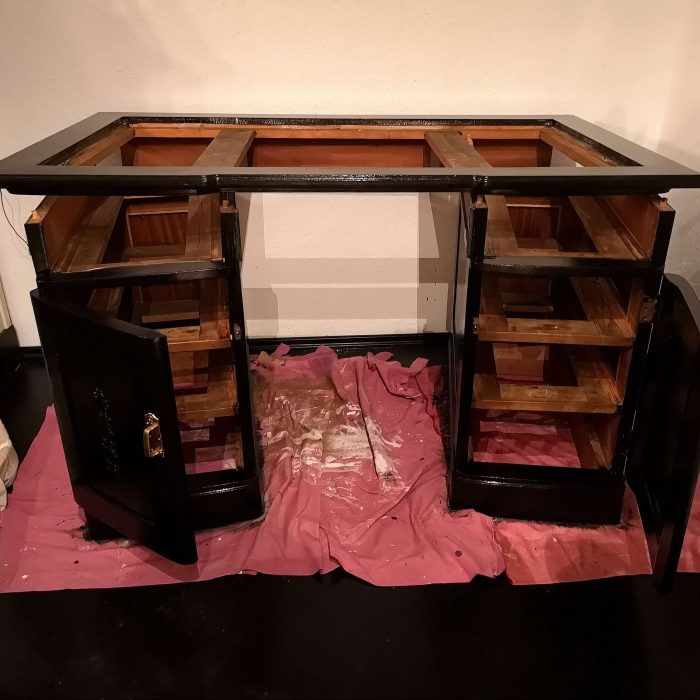
And after that, it was the turn of the BLACK paint finally! I began with all edges and small parts and continued to cover the bigger surfaces. Unfortunately I needed about four layers to get an evenly black (no matter if it was the white prime color or the wooded brown – both needed layers and layers and layers …).
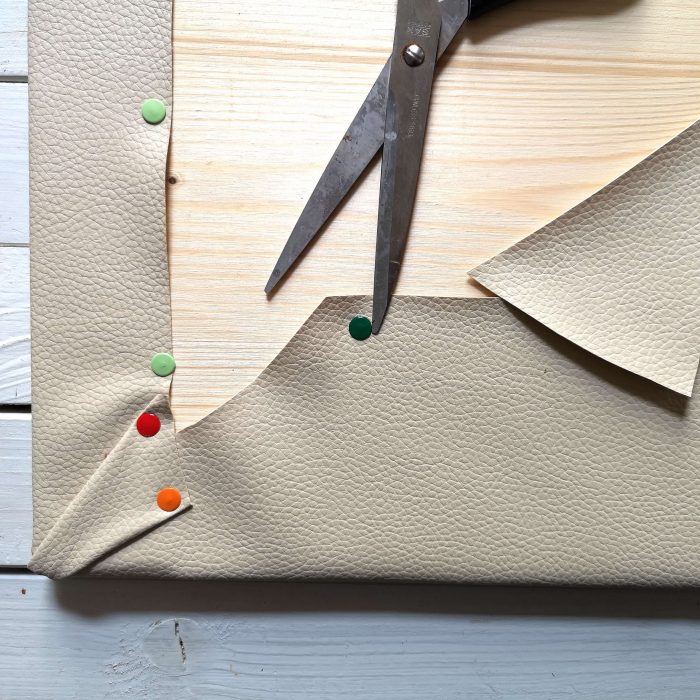
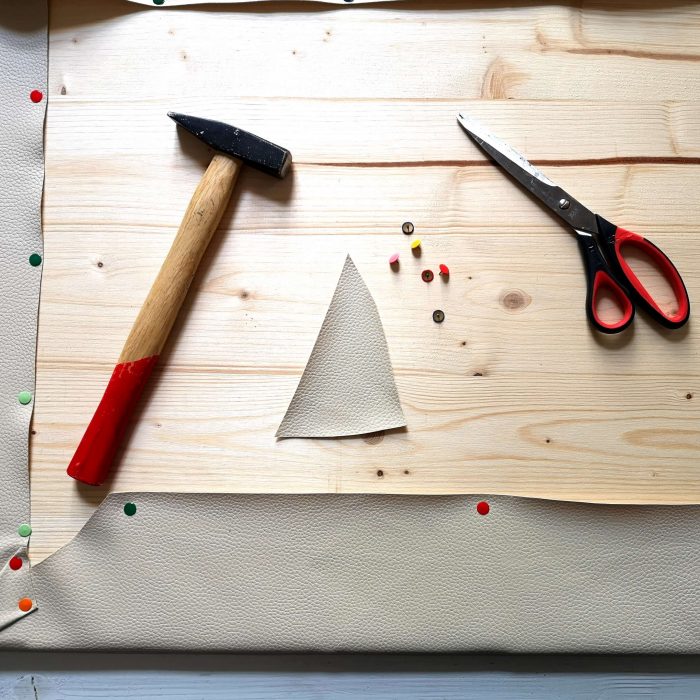
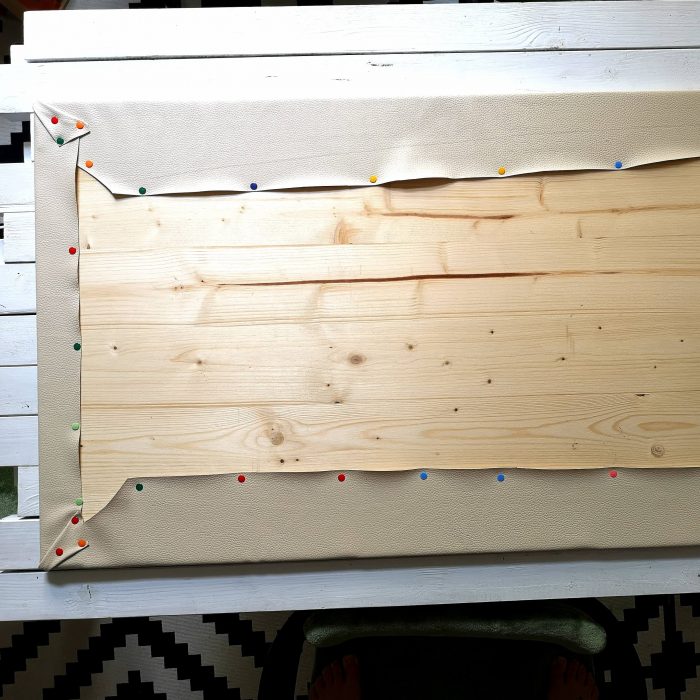
Desk COVER
I guess, there used to be a green felt cover for the middle upper part. At the Glasfabrik a new fitting wooden but naked plate was inserted instead – a perfect serve for Do It Yourself nerds like me! I bought one meter of beige fake leather at Vienna’s Textilmüller and fixed it to the plate with simple office pins.
COCO would be PROUD
And that’s it! 200 €, five evenings and one cleaning session later my Vintage style writing table was finished and is now ready for my many upcoming projects.
And I can assure you, it’s not only my blog I’m gonna be writing for on that table. Stay tuned for my NEW ADVENTURES as a proud working mom – to be REVEALED very soon!
Such an amazing post. Thanks for this great post, I find it very interesting and very well thought out and put together. I look forward to reading your work in the future 🙂
Leave a Reply
This blog uses cookies: We analyze your use of www.madamefaction.com and track your preferences and activities (including Social Media).
Please accept our cookie policy in order to have the best user experience. ACCEPTREJECTREAD MORE
Privacy & Cookies Policy
Privacy Overview
This website uses cookies to improve your experience while you navigate through the website. Out of these, the cookies that are categorized as necessary are stored on your browser as they are essential for the working of basic functionalities of the website. We also use third-party cookies that help us analyze and understand how you use this website. These cookies will be stored in your browser only with your consent. You also have the option to opt-out of these cookies. But opting out of some of these cookies may affect your browsing experience.
Necessary cookies are absolutely essential for the website to function properly. This category only includes cookies that ensures basic functionalities and security features of the website. These cookies do not store any personal information.
Any cookies that may not be particularly necessary for the website to function and is used specifically to collect user personal data via analytics, ads, other embedded contents are termed as non-necessary cookies. It is mandatory to procure user consent prior to running these cookies on your website.


Thank you for your compliments!
Such an amazing post. Thanks for this great post, I find it very interesting and very well thought out and put together. I look forward to reading your work in the future 🙂